




Know your plan.
Picture your project.
Take a closer look at the files, dimensions and building details before you make it yours.
- Pages
- 32
- Paper Size
- US Letter
- Units
- Imperial (feet and inches) with metric reference
- Dimensions
- 16' x 20' frame, 19' 1-1/2" x 23' 1-1/2" roof, about 14' 8" to the top of the ridge
- Skill Level
- Intermediate to Advanced
Full plan details & specifications
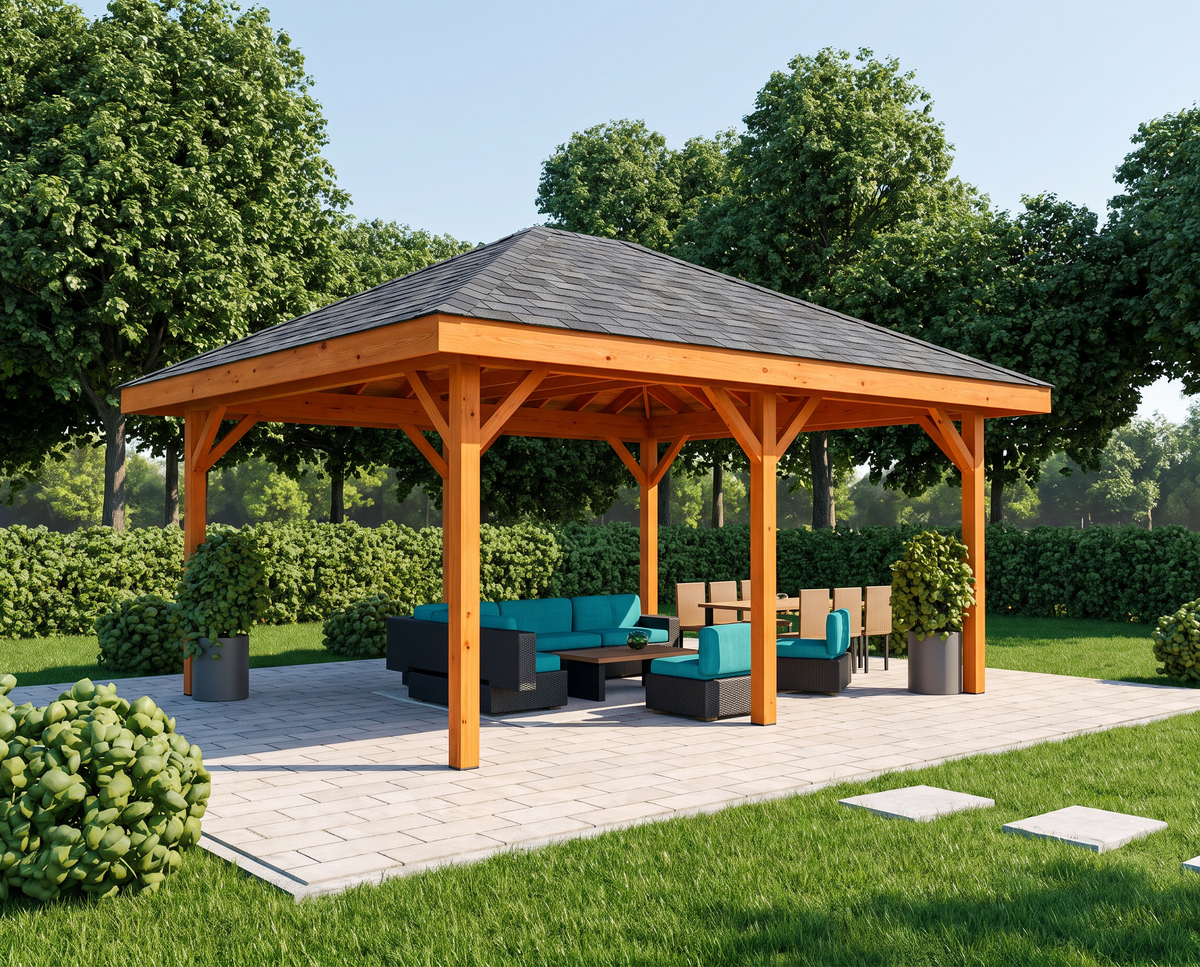
Build a 16x20 hip roof pavilion with these DIY plans: a 32-page PDF with cut lists, rafter templates and 12 illustrated steps for a wood backyard pavilion.
- Product: Crownpoint 16x20 hip roof pavilion plans
- Format: Digital PDF download
- Pages: 32
- Paper Size: US Letter
- Units: Imperial (feet and inches) with metric reference
- Dimensions: 16' x 20' frame, 19' 1-1/2" x 23' 1-1/2" roof, about 14' 8" to the top of the ridge
- Clear Height: 9' 0" under the beams
- Covered Area: 442 sq ft under the roof
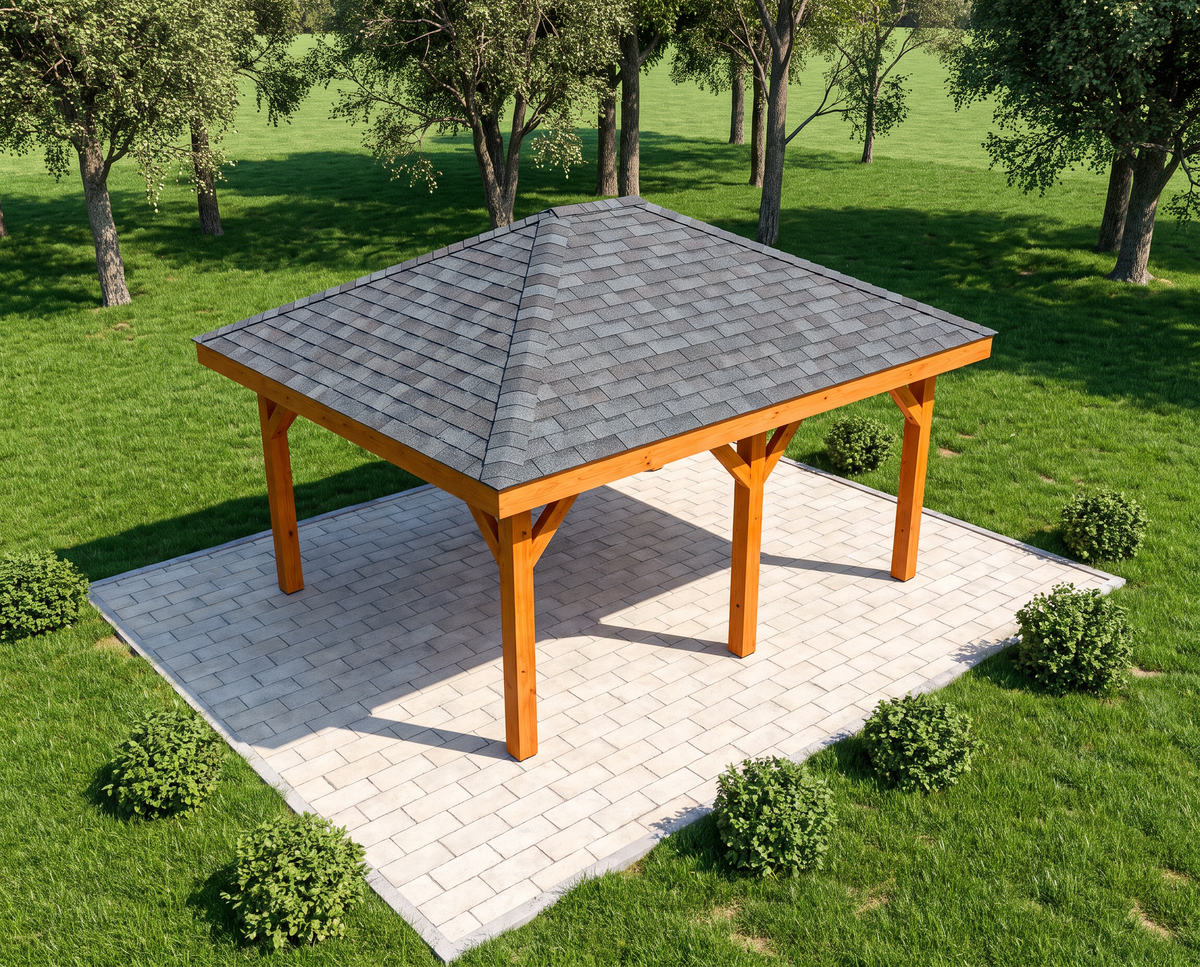
- Roof: Four-way hip roof, 6/12 pitch, architectural asphalt shingles
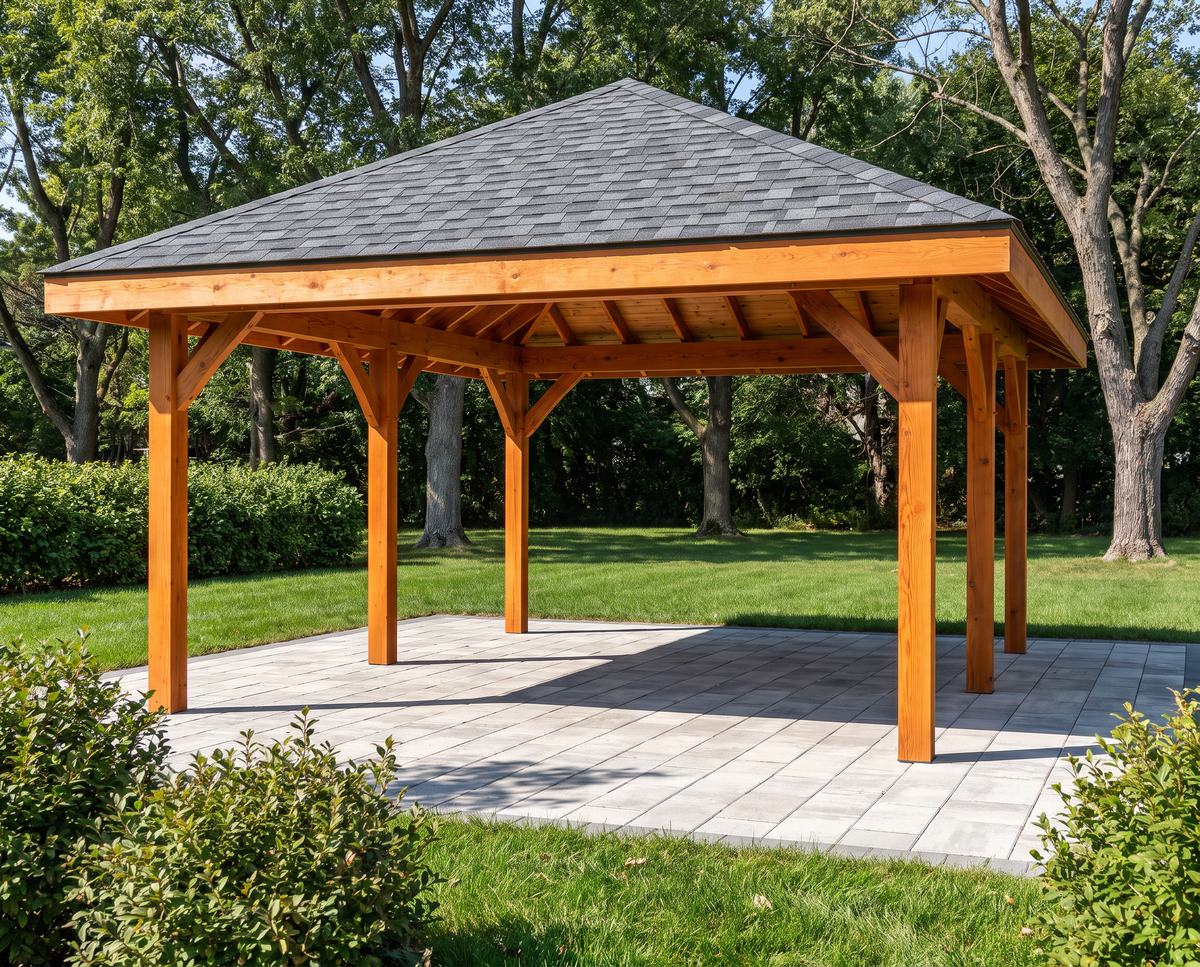
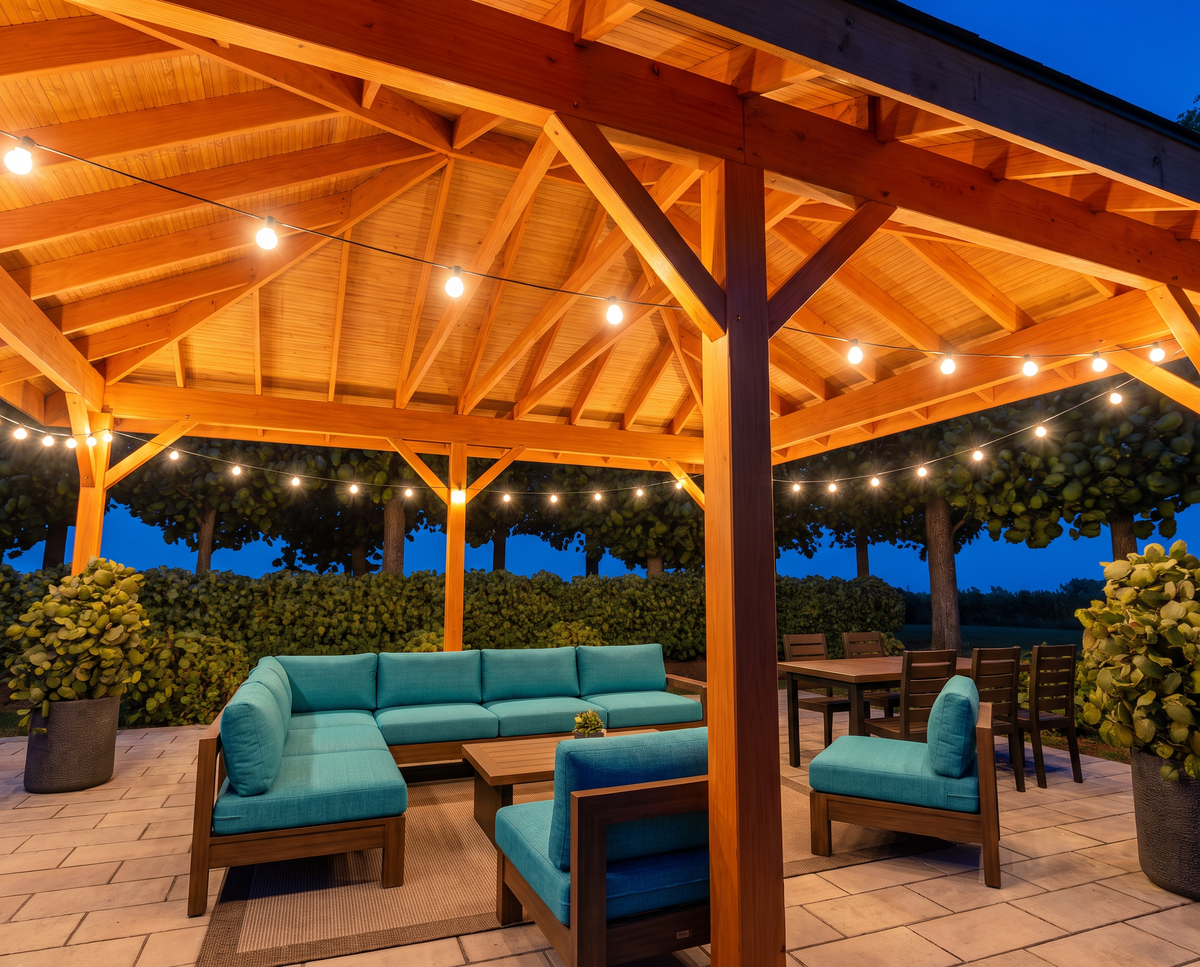
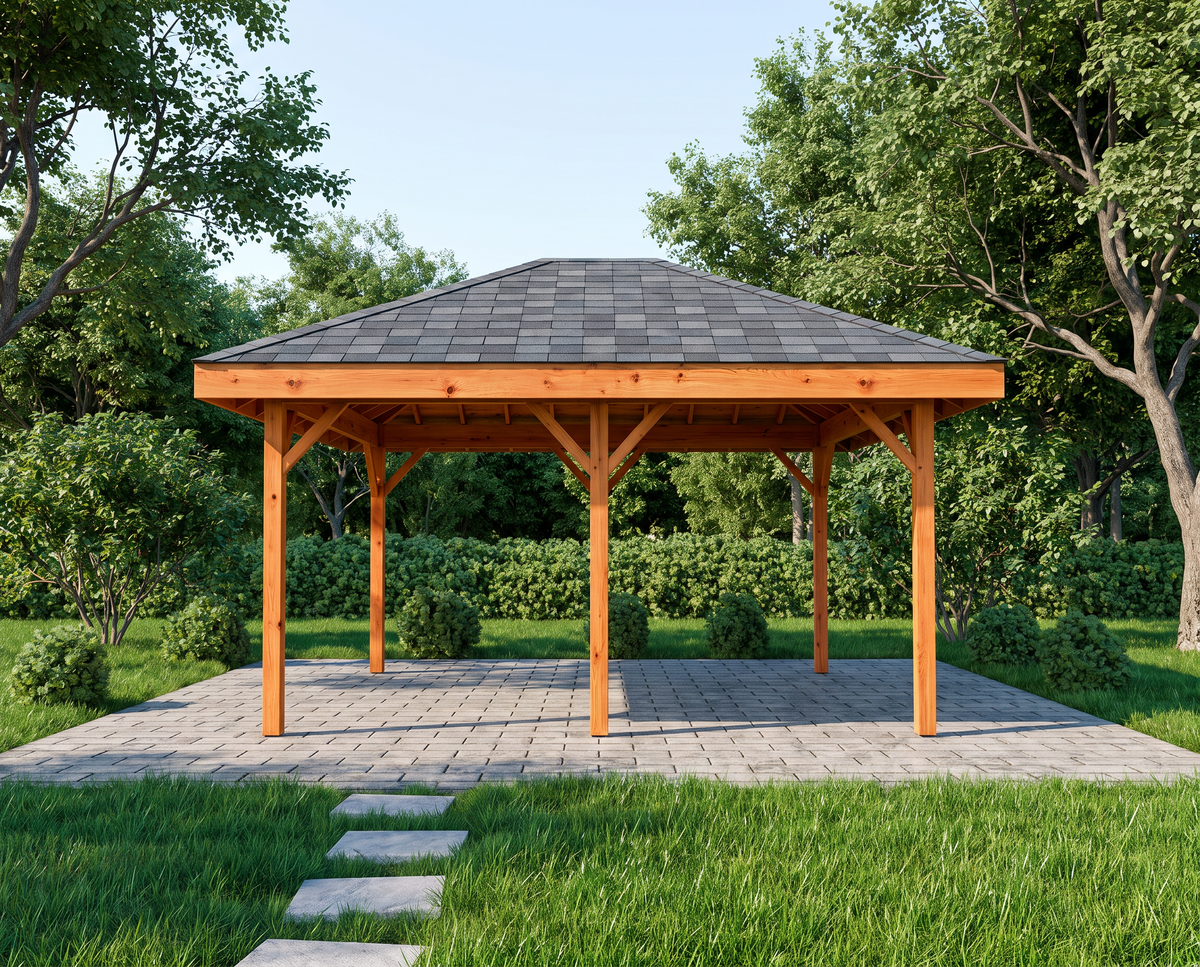
- Style: Timber-frame look with an open wood ceiling and exposed rafter tails
- Construction: 6x6 posts, doubled 2x12 beams, 4x4 knee braces, 2x8 rafters at 24" on center, 2x6 tongue-and-groove decking
- Foundation: Six 12" concrete piers with standoff post bases
- Skill Level: Intermediate to Advanced
- Crew and Time: 2–3 people, about 5–7 full days for the frame and roof
- Includes: Shopping list, master cut list, cut diagrams, elevations, roof framing plan, cutting templates, 12 assembly steps, six renderings
- Best For: Backyard patios, outdoor dining and lounge areas, DIY builders
- Delivery: Instant PDF download after purchase, no physical item shipped
## What's Included in These Hip Roof Pavilion Plans
The Crownpoint plan is a complete set of pavilion blueprints for a free-standing wood pavilion. Every board, cut and connector comes from one model, so the cut list, drawings and steps all match.
- Shopping list for lumber, connectors, roofing and finish
- Master cut list with part IDs for all 74 framing and trim parts
- Board-by-board cut diagrams showing which store board each part comes from
- Dimensioned front and end elevations
- Foundation and post layout with pier positions and diagonals
- Roof framing plan with common, hip and jack rafter positions
- Cutting templates for the common rafter, hip rafter, jack rafters, knee brace and ridge
- 12 illustrated assembly steps, from the piers to the shingles and hip/ridge cap
- Finishing, care and FAQ page
- Six finished renderings of the pavilion
## 16x20 Pavilion Design: Four-Way Hip Roof and Open Wood Ceiling
This 16x20 pavilion uses six 6x6 posts, doubled 2x12 beams on all four sides and 45° knee braces in a post and beam layout. The four-way hip roof at a 6/12 pitch sheds rain on every side and stands up well to wind. The roof is sheathed with 2x6 tongue-and-groove boards, so the underside is a finished wood ceiling with no plywood to hide. Exposed 2x8 rafter tails and a 1x10 fascia give this hip roof gazebo style a clean timber-frame edge. With 9 ft of clear height and 442 sq ft under the roof, there is room for a 10–12 person lounge or dining set.
## File Format, Paper Size and Units
The 16x20 pavilion plans PDF is 32 pages, formatted for US Letter. Print it at 100% ("Actual size") or open it on a tablet or computer. Dimensions are in feet and inches, rounded to the nearest 1/16", with metric values for reference. All lumber is stock size from US home centers, and the longest board is 20 ft.
## Who These DIY Pavilion Plans Are For
These DIY pavilion plans suit intermediate to advanced builders who are comfortable with a circular saw, a framing square and work at height. Hip roof framing needs careful marking, so every cut angle and length is given on the templates. A crew of 2–3 people is recommended. Spring is the busiest season for building an outdoor pavilion, so the colder months are a good time to order lumber, plan the site and get permits ready.
## How to Use Your Backyard Pavilion Plans
1. Purchase the plan and download the PDF from your order confirmation page or email.
2. Open the PDF on your computer or tablet, or print it on US Letter paper at 100% scale.
3. Check local building codes and permit rules, then take the shopping list to your lumber store.
4. Cut the parts using the cut list, cut diagrams and templates, labeling each part with its ID.
5. Follow the 12 illustrated steps to build your backyard pavilion.
## Digital Product Note
This is a digital product, and no physical item is shipped. The PDF is available for instant download after purchase. Renderings show the intended result; real materials and colors will vary.
## License and Terms of Use
This plan is for personal use. You may build as many pavilions as you like for yourself, but you may not resell, copy, share or publish this PDF or its drawings. You are responsible for meeting local building codes and permit requirements; in high-wind or heavy-snow areas, have a local engineer review the plan.
## Frequently Asked Questions
### How do I download the PDF after purchase?
After checkout, you get a download link on the order confirmation page and by email. Click it to download the hip roof pavilion plans PDF right away.
### What are the downsides of a hip roof?
The main downside of a hip roof is that it takes more cuts and careful layout than a gable roof. This plan gives every common, hip and jack rafter cut on full cutting templates.
### How much does it cost to build a 16x20 pavilion?
The cost to build a 16x20 pavilion depends on local lumber and roofing prices. The plan's shopping list gives exact quantities, so you can price the whole pavilion at your local store before you start.
### Does a hip rafter have to be 45 degrees?
On a hip roof with the same pitch on all sides, the hip rafter runs at 45 degrees in plan view. In this plan, each hip runs on the 45° diagonal from the corner and has a 19.5° plumb cut with double 45° cheek cuts, all drawn on the template.
### Can I use a metal roof instead of shingles?
Yes, you can use a metal roof on this pavilion because the 2x6 decking is a solid base. Use the panel maker's hip and ridge trim, and screws short enough not to come through the ceiling.
Looking for another size or style? Browse more DIY pavilion, gazebo and backyard building plans in the KRMPLANS shop, and contact us anytime with a question about this plan.
How will I receive my PDF?
After successful payment, use the download link provided with your order to save your files. Check your order confirmation and email for download instructions.
Need help finding your files? Contact KRMPLANS with your order details.
Is this a physical building or a kit?
You are purchasing downloadable building plans. No physical building, printed booklet, lumber, tools or construction materials are included or shipped.
The displayed price is for the digital plan files.
Can I print the plans or use a tablet?
Yes. Open your PDF on a compatible computer or tablet, or print it using the paper size and scale specified in the plan. Review the full plan details above for this product's format and measurements.
What should I check before building?
Review the dimensions, required skills and included drawings to make sure the design suits your project. Check your site, local building requirements and permit rules before construction.
Refer to the product details for any engineering, foundation or regional considerations. Materials and construction costs are separate from the plan price.
Your next project, in three steps.
Find your fit.
Review the design, dimensions and included files. Choose a plan that works for your space and skills.
Make it yours.
Complete checkout and save your digital PDF. View it on your device or print it for your workspace.
Get ready to build.
Read the plan, prepare your materials and confirm local requirements before starting your project.
A question before you start?Let us help you understand the plan or access your download.
ASK KRMPLANS ↗