




Know your plan.
Picture your project.
Take a closer look at the files, dimensions and building details before you make it yours.
- Pages
- 43
- Paper Size
- US Letter
- Units
- Imperial (feet-inches, 1/16" precision); cut list also shows mm
- Dimensions
- 24' x 30' footprint, 720 sq ft, about 17' 6" tall at the ridge
- Skill Level
- Intermediate
Full plan details & specifications
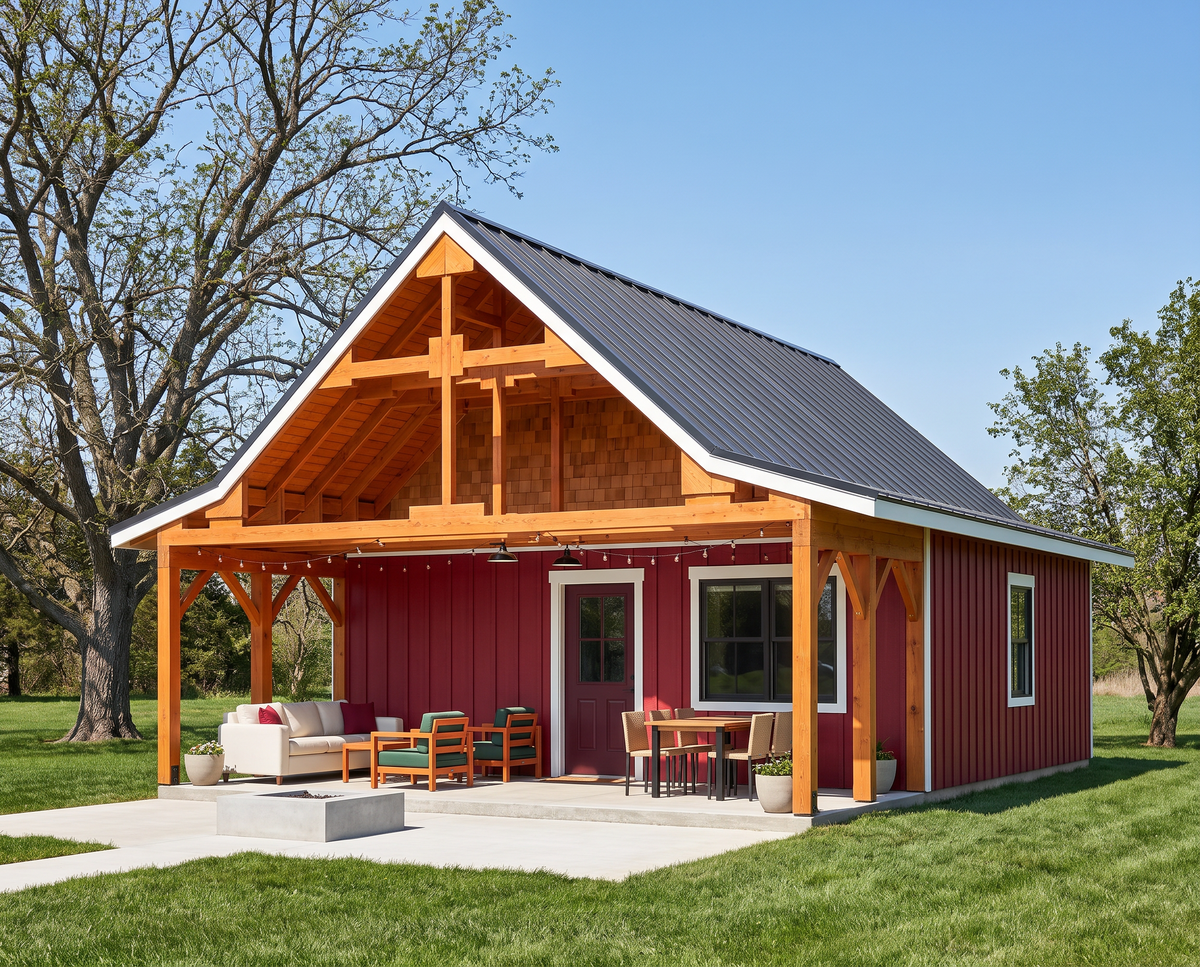
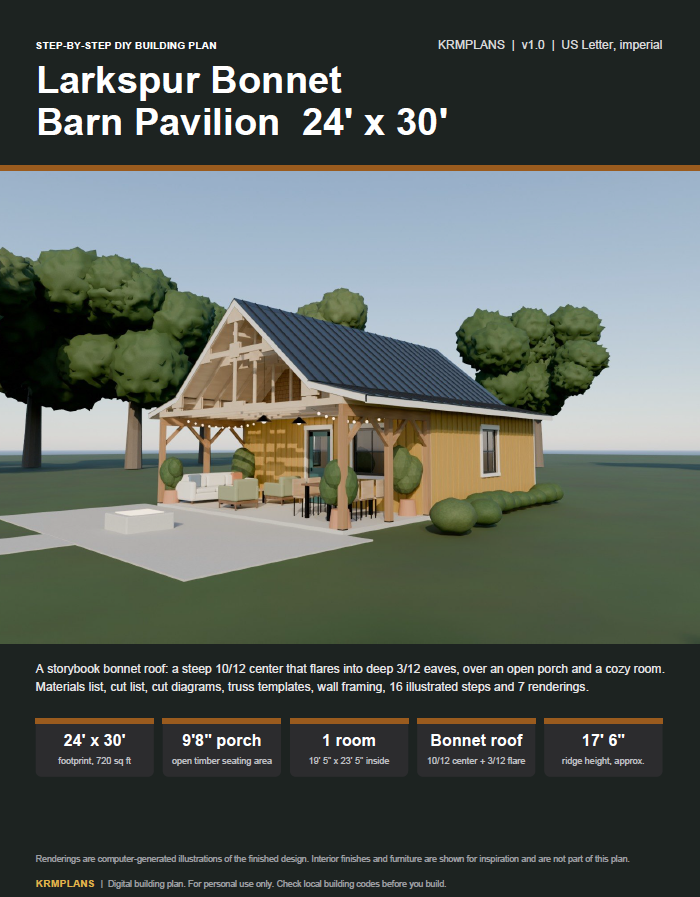
DIY bonnet roof barn plans for a 24x30 barn pavilion with a steep roof that flares into deep eaves, an open timber porch and a cozy studio room. PDF plan.
- Product: Larkspur Bonnet Barn Pavilion 24' x 30' building plan
- Format: Digital PDF download
- Pages: 43
- Paper Size: US Letter
- Units: Imperial (feet-inches, 1/16" precision); cut list also shows mm
- Dimensions: 24' x 30' footprint, 720 sq ft, about 17' 6" tall at the ridge
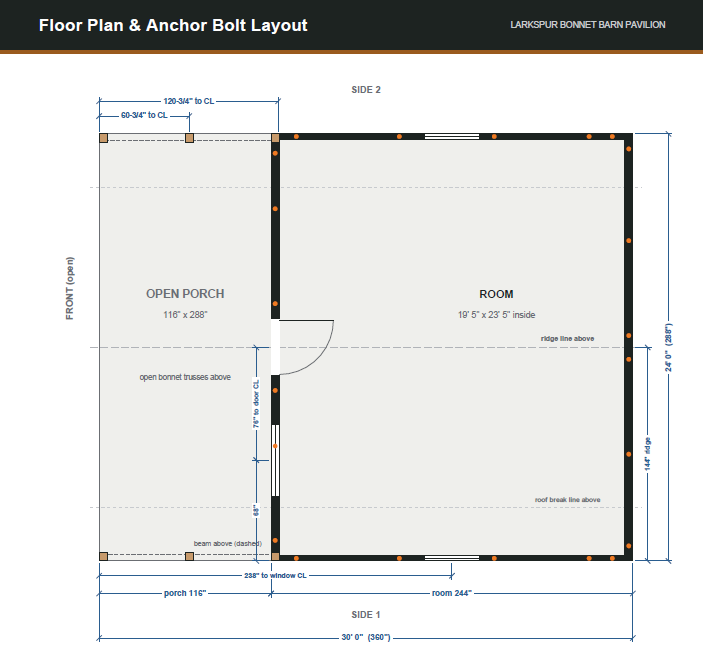
- Layout: 9' 8" open timber porch + one room 19' 5" x 23' 5" inside (about 455 sq ft)
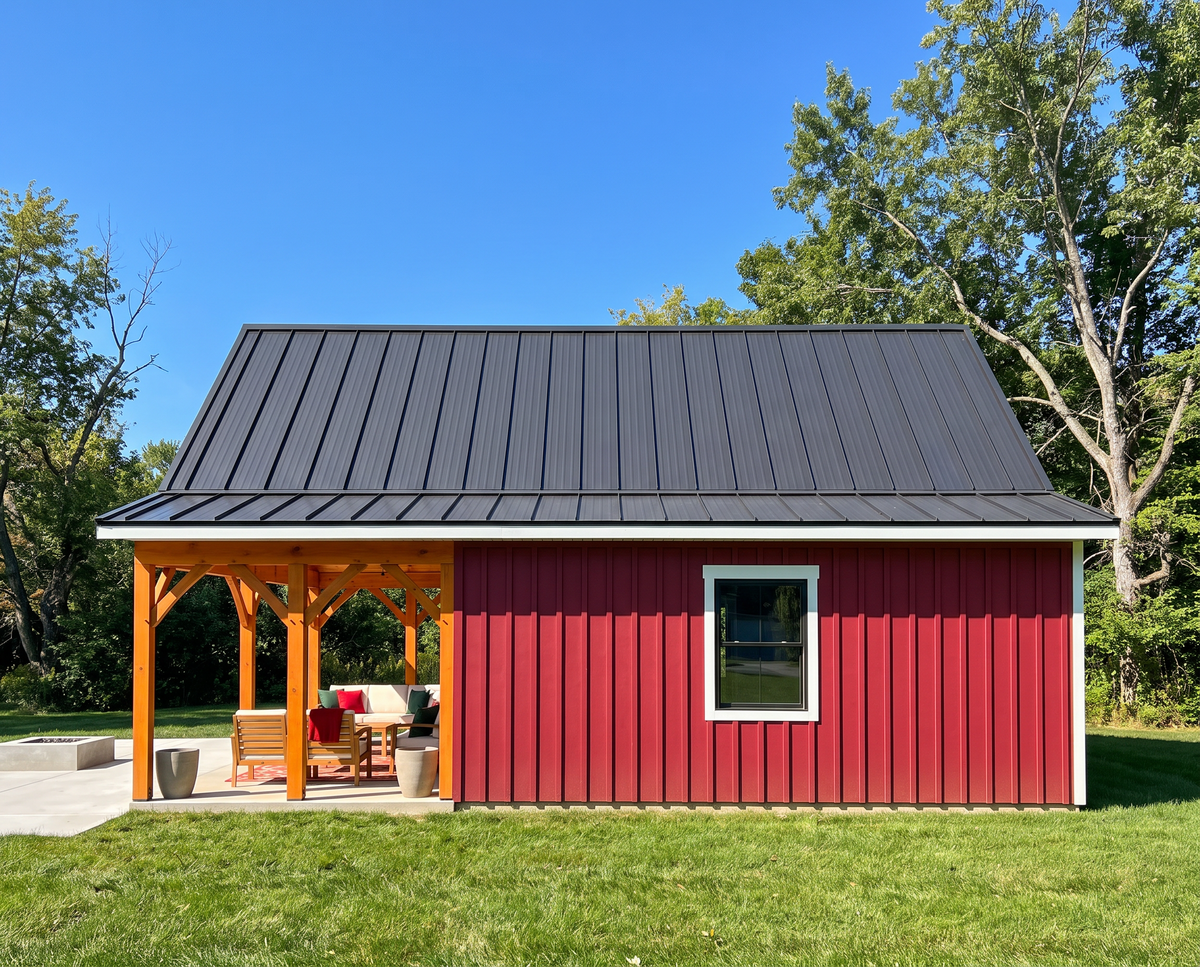
- Roof: Bonnet-style gable roof with a steep 10/12 center that breaks into a 3/12 flared skirt and 24" eaves on both long sides, 16 site-built bonnet trusses, standing-seam metal roof
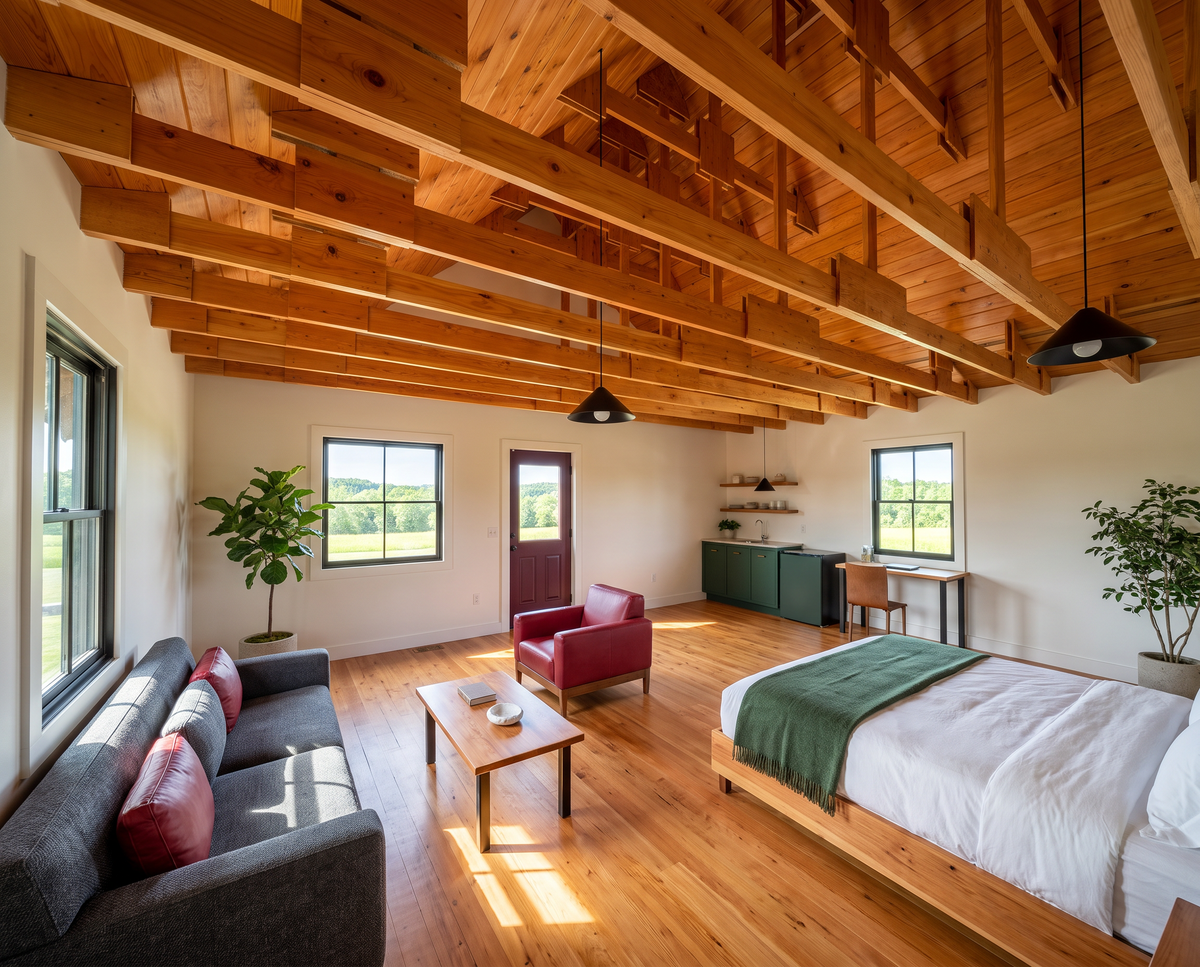
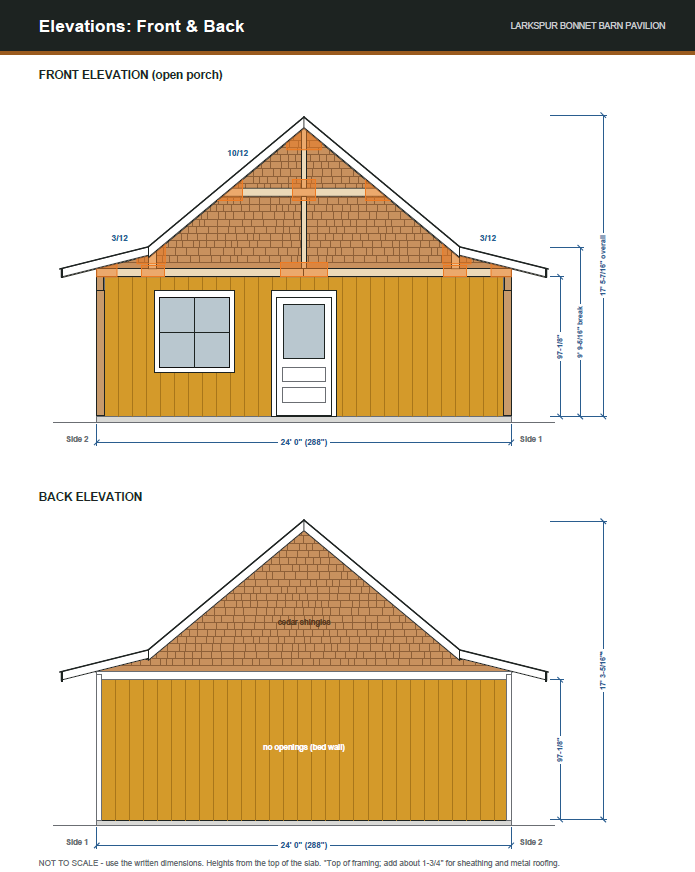
- Ceiling: Exposed tie beams at 8' 1-1/8", with a lined vault rising to about 16' 7" under the ridge
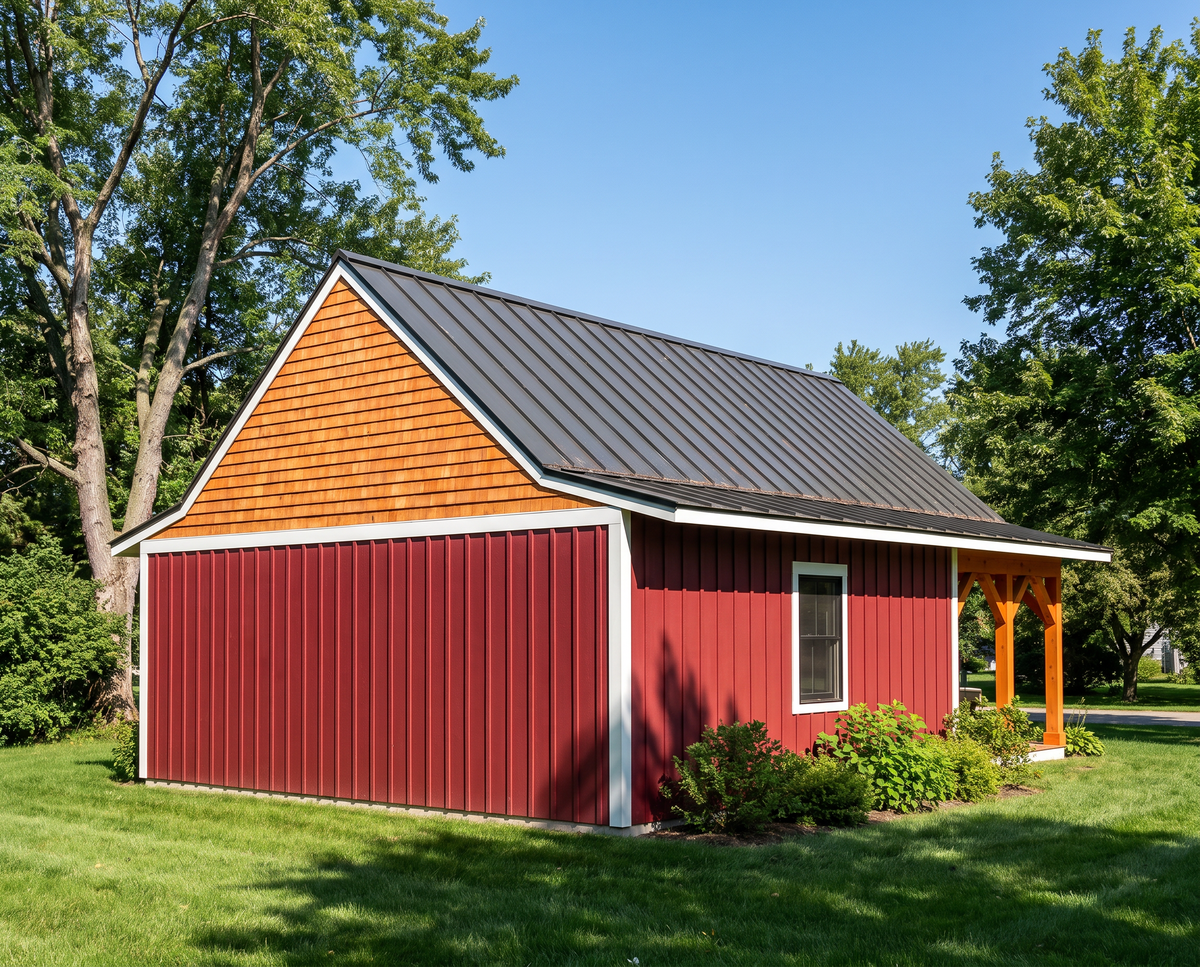
- Style: Storybook barn with golden-ochre board-and-batten walls, cedar shingle gables, white trim, a deep teal door and oiled timbers
- Skill Level: Intermediate
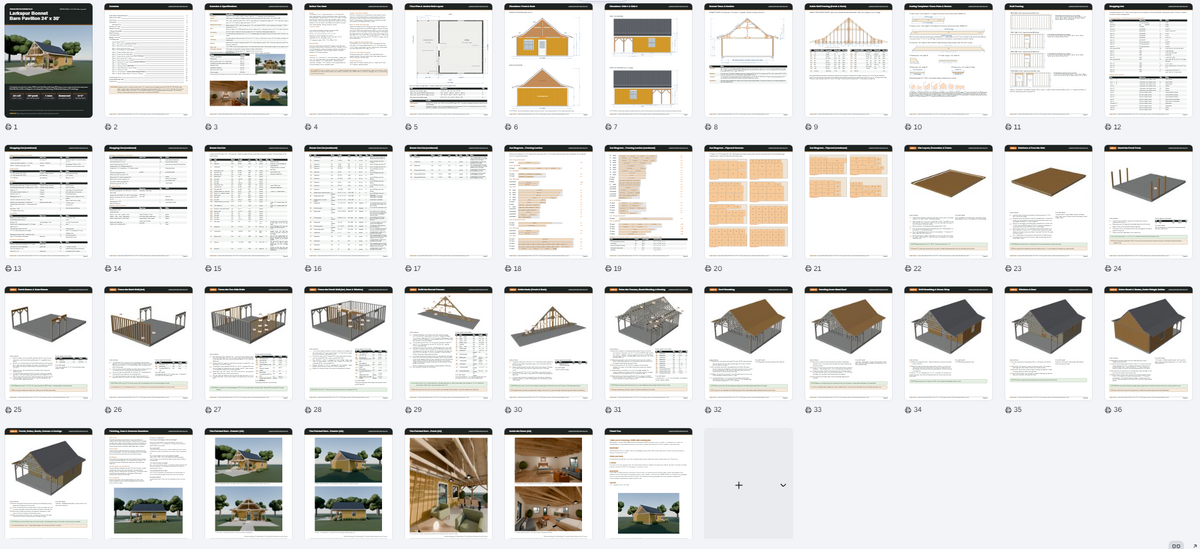
- Includes: Floor plan, four elevations, bonnet truss section, gable framing, cutting templates, wall framing, shopping list, master cut list, cut diagrams, 16 steps, 7 renderings
- Best For: DIY builders who want a cottage-style backyard barn pavilion with a covered porch and a studio or guest room
- Delivery: Instant PDF download after purchase, no physical item shipped
## What's Included in This Bonnet Roof Barn Pavilion Plan
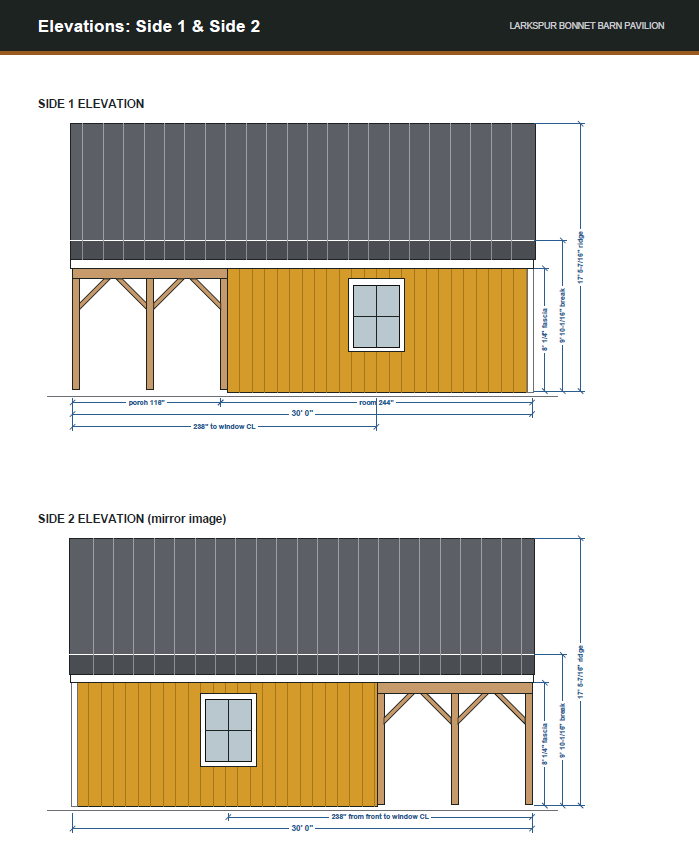
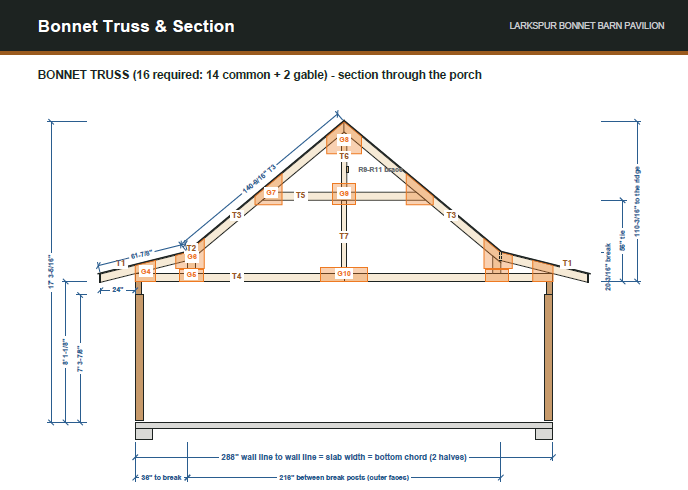
This 24x30 bonnet roof barn pavilion puts one roof over two spaces: an open timber porch at the front and a one-room studio at the back. The steep center roof breaks 36" in from each side wall and flares into a gentle skirt, which gives the barn its soft, storybook outline. The porch is framed with six 6x6 posts, built-up beams and knee braces, and the exposed bonnet truss stays visible overhead.
The plan covers the whole build, from the slab to the trim:
- Floor plan with anchor bolt and post base layout
- Front, back and both side elevations with all key heights
- Bonnet truss section with every member length and gusset location
- Gable wall framing with stud lengths and top-cut angles for both gables
- Cutting templates for skirt chords, upper chords, collar ties, break posts, king posts, knee braces and plywood gussets
- Wall framing drawings for the side walls and the 2x6 end walls
- Shopping list grouped by material, with an estimated material budget
- Master cut list with part IDs, cut diagrams and a gusset sheet layout
- 16 illustrated step-by-step pages, from site layout to trim
- Finishing and care notes, plus 7 finished renderings
## How the Flared Bonnet Roof Is Framed
Each bonnet truss joins a 3/12 skirt chord to a 10/12 upper chord at a short 2x6 break post, so the whole roof uses only two angles: 14.0 and 39.8 degrees. A collar tie, a king post and a center hanger complete each truss, and 2x6 break blocks between the trusses carry the sheathing edges and the pitch-break flashing. All 16 trusses are built on site at 24" on center.
## File Format, Paper Size and Units
The plan is a 43-page PDF sized for US Letter paper. All dimensions are imperial, in inches and feet-inches to 1/16", measured from the top of the slab. The cut list adds a millimeter column, and part IDs match every drawing and step page.
## Who This Storybook Barn Plan Is For
This storybook barn plan suits intermediate DIY builders working with 2 to 3 people. Expect about 9 to 11 weekends of work after the slab cures. The plan delivers a weather-tight shell; insulation, interior finishes, electrical and plumbing follow your local code.
## How to Use Your PDF Plan
1. Complete your purchase on the KRMPLANS store.
2. Download the PDF from the link on the confirmation page or in your email.
3. Print it on US Letter paper or open it on a tablet or computer.
4. Follow the shopping list, cut list and 16 steps to build your bonnet roof barn.
## Digital Product Notice
This is a digital download. No physical item is shipped. The PDF is available to download right after purchase. Renderings show furniture and interior finishes for inspiration only; they are not part of the plan.
## Terms of Use
This plan is for personal use only. You may build the structure for yourself, but sharing, reselling or redistributing the PDF file is not allowed. The plan is a design guide, not a stamped engineering document, so check your local building codes before you build.
## Frequently Asked Questions
### What is a bonnet roof?
A bonnet roof has a steep upper slope that breaks into a gentler lower slope with a flared eave. This plan uses that bonnet roof profile on both long sides of a gable barn, with cedar shingle gables at the front and back.
### What is a bellcast roof?
A bellcast roof flares outward at the bottom of the slope, like the rim of a bell. In this barn the flare is a 3/12 skirt that kicks out from the 10/12 roof at the break line.
### How much does it cost to build a 24x30 bonnet roof barn pavilion?
The plan estimates materials for this 24x30 bonnet roof barn pavilion at about $20,000 to $24,000 at typical US big-box prices. Tax, delivery and regional price changes are not included.
### Do I need a permit for a 720 sq ft barn pavilion?
A 720 sq ft barn pavilion with a finished room usually needs a building permit. Have your building department or a local engineer review the plan for your snow, wind and frost conditions.
### How do I download the PDF after purchase?
You can download the PDF right after purchase from the link on the order confirmation page or in your confirmation email. No physical item is shipped.
## More Building Plans from KRMPLANS
Browse the KRMPLANS store for more DIY building plans, including barn pavilions, cabins, coops and backyard structures. If you have a question about this bonnet roof barn plan, send us a message and we will be happy to help.
How will I receive my PDF?
After successful payment, use the download link provided with your order to save your files. Check your order confirmation and email for download instructions.
Need help finding your files? Contact KRMPLANS with your order details.
Is this a physical building or a kit?
You are purchasing downloadable building plans. No physical building, printed booklet, lumber, tools or construction materials are included or shipped.
The displayed price is for the digital plan files.
Can I print the plans or use a tablet?
Yes. Open your PDF on a compatible computer or tablet, or print it using the paper size and scale specified in the plan. Review the full plan details above for this product's format and measurements.
What should I check before building?
Review the dimensions, required skills and included drawings to make sure the design suits your project. Check your site, local building requirements and permit rules before construction.
Refer to the product details for any engineering, foundation or regional considerations. Materials and construction costs are separate from the plan price.
Your next project, in three steps.
Find your fit.
Review the design, dimensions and included files. Choose a plan that works for your space and skills.
Make it yours.
Complete checkout and save your digital PDF. View it on your device or print it for your workspace.
Get ready to build.
Read the plan, prepare your materials and confirm local requirements before starting your project.
A question before you start?Let us help you understand the plan or access your download.
ASK KRMPLANS ↗