




Know your plan.
Picture your project.
Take a closer look at the files, dimensions and building details before you make it yours.
- Pages
- 28
- Paper Size
- US Letter
- Units
- Imperial (inches, 1/16" precision), metric cut lengths for reference
- Dimensions
- Bed 72" x 36" outside, 79" wide at the trellis posts, 87" top cap, 6' 1-1/2" to the top of the trellis cap
- Skill Level
- Beginner (square cuts except the collar taper and two lid props, templates included)
Full plan details & specifications
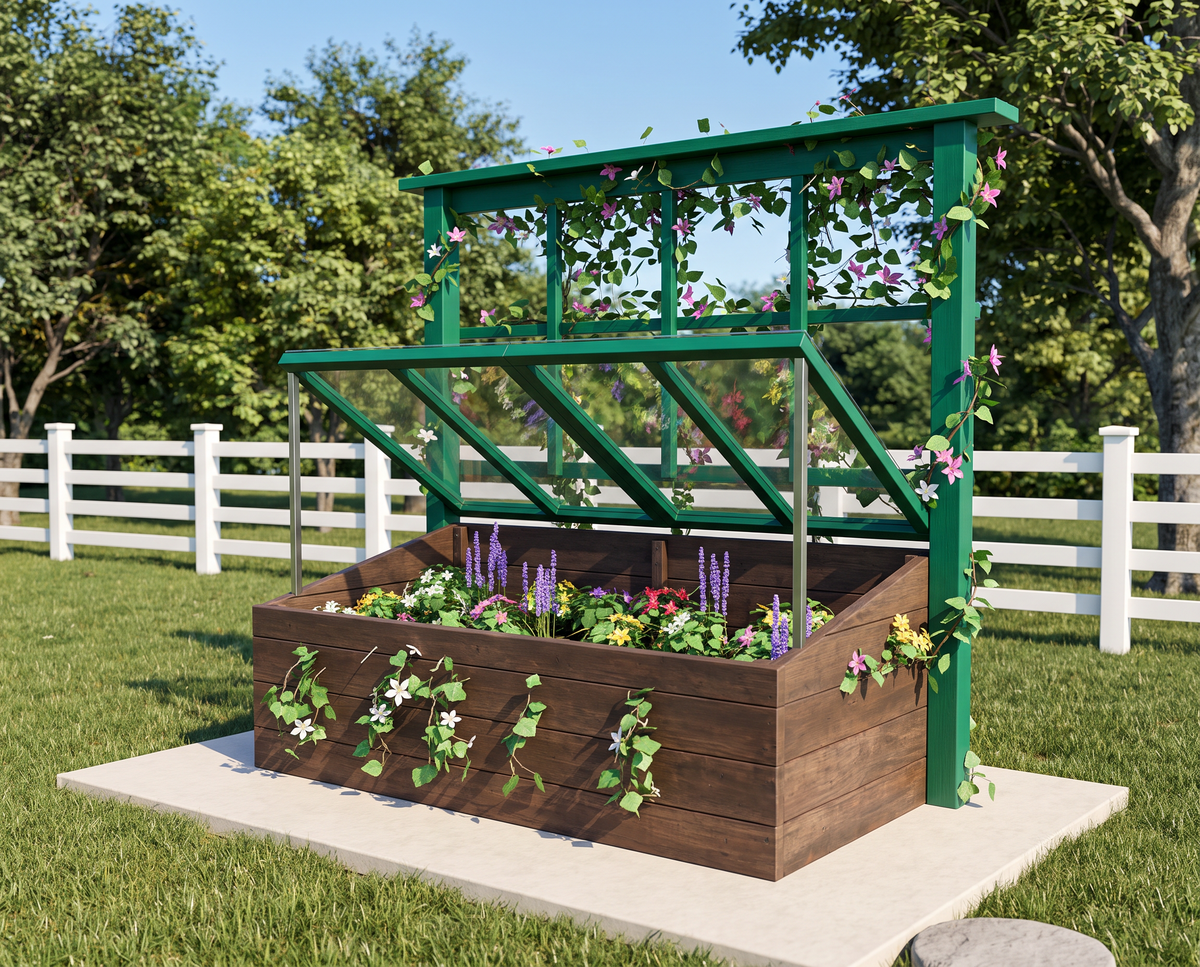
DIY cold frame raised garden bed plans: a 6' x 3' cedar bed with two hinged polycarbonate lids and a 6' climbing trellis. Beginner PDF plan, one weekend build.
- Product: Fernhill Cold-Frame Raised Garden Bed, a 6' x 3' cedar raised bed with a sloped cold frame, two hinged lids and a climbing trellis
- Format: Digital PDF download
- Pages: 28
- Paper Size: US Letter
- Units: Imperial (inches, 1/16" precision), metric cut lengths for reference
- Dimensions: Bed 72" x 36" outside, 79" wide at the trellis posts, 87" top cap, 6' 1-1/2" to the top of the trellis cap
- Bed Depth: 3 rows of 2x6 cedar, 16-1/2" deep
- Cold Frame: Front collar 20" high, back collar 27-1/2" high, lids slope 12.3 degrees toward the sun
- Lids: Two 35-3/4" x 38" cedar frames glazed with 8 mm UV-protected twin-wall polycarbonate, hinged at the back with props
- Trellis: Two 4x4 posts, 2x4 rails and a 2x2 grid with 8 openings
- Growing Area: 15.8 sq ft, about 20 cu ft (0.76 cu yd) of soil
- Style: Natural cedar bed with sage green painted trellis and lid frames
- Skill Level: Beginner (square cuts except the collar taper and two lid props, templates included)
- Build Time: One weekend
- Includes: 13 illustrated steps, shopping list, master cut list, cut diagrams, templates, elevation and plan drawings, 7 finished renderings
- Best For: Gardeners who want to start early greens in spring and keep lettuce, spinach, kale and herbs growing into early winter
- Delivery: Instant PDF download after purchase, no physical item shipped
## What's Included in This Cold Frame Raised Garden Bed Plan
This 28-page plan shows you how to build a cedar raised garden bed with a built-in cold frame. A sloped collar on top of the bed carries two hinged polycarbonate lids that face the sun, and a climbing trellis along the back holds the lids when they open and gives vines a place to grow.
- Overview and specifications table
- Front elevation, side elevations with lids closed and open, and plan view drawings
- Before You Start notes on tools, lumber, paint, polycarbonate and fasteners
- Shopping list for lumber, polycarbonate sheet, hardware and supplies
- Master cut list with part IDs, cut lengths and millimeter references
- Cut diagrams for every board and the 4 x 8 ft polycarbonate sheet
- Templates for the tapered side collar, the lid props and the lid frame
- 13 illustrated steps, each with parts, fasteners, a tip and a check
- Seasons, finishing and care guide
- 7 computer renderings of the finished bed with lids closed, open and planted
## Raised Bed Cold Frame Features
- 6' x 3' cedar raised bed, 16-1/2" deep, on 4x4 corner posts with a middle cross tie
- Sloped cold frame collar cut from a tapered 2x12, so the lids tilt toward the sun
- Two separate lids, so you can vent one side and keep the other closed
- Twin-wall polycarbonate glazing, light and insulating instead of breakable glass
- Lid props hold each lid open at 45 degrees
- 6' climbing trellis bolted to the bed ends for sweet peas, clematis, morning glory and pole beans
## Cedar Cold Frame Plans in PDF Format
The plan is a digital PDF on US Letter paper. All drawings and measurements are imperial, in inches to 1/16" precision. The cut list also shows millimeters for reference. You can print the pages for the workshop or open them on a tablet or phone.
## Who These DIY Cold Frame Plans Are For
The build is beginner friendly: almost every cut is square, and templates cover the collar taper and the two lid props. You need a miter or circular saw, a jigsaw, a drill/driver and a fine-tooth blade for the polycarbonate. It suits gardeners who want a raised garden bed with a cover to start seeds and greens early in spring and grow them later into the fall.
## How to Use This Raised Bed Cold Frame Plan
1. Purchase the plan.
2. Download the PDF from the link on your order page and in your email.
3. Print it or open it on your screen.
4. Buy materials from the shopping list and cut parts with the cut list and cut diagrams.
5. Follow the 13 illustrated steps to build the bed, the cold frame lids and the trellis.
## Digital Product Note
This is a digital download. No physical item is shipped. The PDF is available instantly after purchase.
## Terms of Use
This plan is for personal use. You may build as many as you like for your own property. You may not resell, share or publish the PDF or its drawings.
## Frequently Asked Questions
### How do I download the PDF after purchase?
After checkout you get a download link on the order confirmation page and in your confirmation email. Click it to download the PDF, then print it or open it on any device.
### Which way should a cold frame face?
A cold frame should face the sun with its low front side, which is south in the northern hemisphere. In this plan the lids slope 12.3 degrees from the trellis side down to the front.
### Can I use glass instead of polycarbonate on a cold frame?
The plan does not recommend glass for this cold frame, because glass is heavy and breaks. Twin-wall polycarbonate is light, insulates and diffuses the light.
### When should I open the cold frame lids?
Open the cold frame lids when it is above about 60 F outside, because a closed cold frame gets hot quickly on sunny days. Close them on cold nights, and in summer you can keep them open or lift them off their hinges.
### Can I build the raised bed cold frame without the trellis?
It is not recommended, because the trellis bottom rail is what stops the lids from swinging over backward. Without it, fit a short chain from each lid to the back collar as a stop.
## More Building Plans from KRMPLANS
Browse the KRMPLANS shop for more DIY building plans for your garden and backyard. If you have a question about this plan, send us a message and we will be happy to help.
How will I receive my PDF?
After successful payment, use the download link provided with your order to save your files. Check your order confirmation and email for download instructions.
Need help finding your files? Contact KRMPLANS with your order details.
Is this a physical building or a kit?
You are purchasing downloadable building plans. No physical building, printed booklet, lumber, tools or construction materials are included or shipped.
The displayed price is for the digital plan files.
Can I print the plans or use a tablet?
Yes. Open your PDF on a compatible computer or tablet, or print it using the paper size and scale specified in the plan. Review the full plan details above for this product's format and measurements.
What should I check before building?
Review the dimensions, required skills and included drawings to make sure the design suits your project. Check your site, local building requirements and permit rules before construction.
Refer to the product details for any engineering, foundation or regional considerations. Materials and construction costs are separate from the plan price.
Your next project, in three steps.
Find your fit.
Review the design, dimensions and included files. Choose a plan that works for your space and skills.
Make it yours.
Complete checkout and save your digital PDF. View it on your device or print it for your workspace.
Get ready to build.
Read the plan, prepare your materials and confirm local requirements before starting your project.
A question before you start?Let us help you understand the plan or access your download.
ASK KRMPLANS ↗